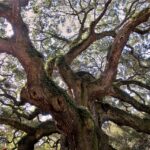
Best Time to Plant a Red Maple Tree for Healthy Growth

When I decided to add a Red Maple to my yard, I wanted to make sure I got the timing right for the best possible start. It turns out, the best time to plant a red maple tree isn’t just about convenience; it impacts how well it grows. I’ve been looking into what works best, and it seems like a little planning goes a long way for these beautiful trees.
Key Takeaways
- The best time to plant a Red Maple tree is generally in early spring or early fall when the weather is mild. This allows the roots to establish before the stress of summer heat or winter cold.
- Avoid planting during the peak of summer when high temperatures can stress the young tree, or in the dead of winter when the ground is frozen and root growth is impossible.
- When planting, prepare the site by ensuring good drainage, adequate sunlight (full sun to partial shade), and enough space for the tree’s mature size, considering its root system.
- Dig the hole about twice as wide as the root ball and just as deep, making sure the root flare sits at or slightly above ground level. Backfill gently, avoiding overly compacted soil.
- After planting, water deeply and consistently, especially during the first two years, and apply a layer of mulch around the base to help retain moisture and regulate soil temperature.
Why Timing Matters
When I think about planting a new tree, especially something as lovely as a Red Maple, the first thing that comes to mind is timing. It does make a difference, you know? Getting the planting right at the start sets the stage for how well that tree will do for years to come. It’s all about giving those roots the best possible chance to settle in and get established before the real challenges of the seasons hit.
Why Early Spring or Fall is Best
From what I’ve gathered, the sweet spot for planting a Red Maple is either in early spring or early fall. Why these times? Well, the weather is usually more forgiving. We’re talking mild temperatures, not too hot and not too cold. This gentle climate allows the tree to focus its energy on growing roots into the surrounding soil, rather than stressing about surviving extreme heat or frost. It’s like giving the tree a comfortable head start.
Root Establishment: The Key to a Healthy Tree
Think of it this way: a tree’s roots are its anchor and its lifeline. When you plant a Red Maple during these optimal periods, the soil is typically moist and the temperatures are moderate. This combination encourages the roots to spread out and develop a strong network. A well-established root system means the tree can better access water and nutrients, and it will be much more resilient when faced with dry spells, strong winds, or the harshness of winter. It’s the foundation for everything else.
The Impact of Planting Time on Tree Survival
- Early Spring: The ground is thawing, and there’s usually plenty of moisture. The tree has the entire growing season ahead to establish itself before winter.
- Early Fall: The soil is still warm from summer, but the air is cooling down. This encourages root growth while slowing top growth, which is ideal.
Planting at the wrong time can really set a tree back. If you plant during the heat of summer, the tree might struggle to get enough water, and the intense sun can scorch its leaves. Conversely, planting too late in the fall or during winter means the ground might be frozen, or the young roots won’t have enough time to establish before the cold sets in.
So, picking the right season isn’t just a suggestion; it’s a pretty important step for ensuring your Red Maple gets off to a good start and thrives for years to come. It’s worth taking the time to get this part right, and you can find more details on the best time to plant a red maple tree to help you out.
Optimal Seasons

When it comes to planting a red maple, timing really is everything. I’ve learned that getting this right sets the stage for a strong, healthy tree for years to come. While you can technically plant them outside of these windows, sticking to the sweet spots of early spring or early fall makes a big difference.
Early Spring Planting
Planting in early spring, after the last hard frost but before the real heat kicks in, is a fantastic option. The soil is starting to warm up, which is great for root development, and the air is still cool enough that the tree isn’t immediately stressed by heat. This gives the young tree a good chance to establish itself before summer arrives. I usually aim for a time when the ground is workable but not waterlogged.
Early Fall Planting
Early fall is another prime time. The intense heat of summer is gone, and the soil is still warm from those months. This combination is ideal because it encourages root growth while the top of the tree is slowing down its activity. It’s like the tree can focus all its energy underground. Plus, a good watering before winter really sets in helps protect those new roots.
Both of these periods offer a balance of moderate temperatures and soil conditions that significantly reduce transplant shock and promote vigorous root establishment.
Here’s a quick look at why these seasons work so well:
- Root Growth: Warm soil encourages roots to spread and anchor the tree.
- Reduced Stress: Cooler air temperatures mean the tree doesn’t have to work as hard to stay hydrated.
- Moisture Retention: The natural rainfall patterns in spring and fall are often more consistent, aiding in keeping the soil moist.
It’s important to remember that even with the best timing, consistent watering is key. The goal is to keep the soil consistently moist, but not soggy, especially in the first few weeks after planting. This helps the roots settle in without drying out or drowning.
I’ve found that choosing between spring and fall often comes down to what works best for my schedule and local weather patterns. Either way, getting the planting done before extreme temperatures hit is the main goal. You can find more details on specific planting needs at Nature Hills Nursery.
Avoiding Stress
When I think about planting a red maple, I always consider the weather. It just makes sense to avoid planting when it’s really hot or really cold. Trying to get a tree established during extreme temperatures is like asking a baby to run a marathon – it’s just too much stress.
Planting in Summer Heat
Summer planting is tough because the ground can be dry and hot. Red maples need consistent moisture, especially when they’re young and their roots haven’t spread out much. If the soil is too dry, the roots can’t take up water, and the leaves might start to wilt. This can set the tree back. Plus, you’ll have to water it constantly, which can be a real chore.
Winter’s Chill and Planting
Planting in winter is also problematic. The ground might be frozen, making it impossible to dig a proper hole. Even if you can dig, the roots can get damaged by the cold. The tree is also dormant, so it’s not actively growing and trying to establish itself. It’s better to wait until the soil is workable and the tree can start growing when planted. I’ve learned that trying to plant when the ground is frozen is just asking for trouble.
- Extreme temperatures stress young trees.
- Summer heat can dry out the soil and damage delicate roots.
- Winter’s frozen ground prevents proper root establishment.
- Both extremes require more intensive care to compensate.
Trying to plant a red maple during the peak of summer or the depths of winter can lead to significant transplant shock. The tree’s energy is better spent on establishing roots in more moderate conditions, rather than fighting against harsh environmental factors. This can weaken the tree and make it more susceptible to issues like gloomy scale.
Zone-Specific Timing

When I’m thinking about planting a red maple, I always consider my local climate. It’s not just about avoiding extreme heat or cold; it’s about giving the tree the best possible start for its roots to settle in. Different parts of the country have very different weather patterns, and knowing your USDA Hardiness Zone is a good first step.
Understanding Your Hardiness Zone
Your USDA Hardiness Zone tells you the average annual extreme minimum temperature for your area. This is super important because it helps you understand which plants can survive the winter in your region. Red maples are generally hardy, but knowing your zone helps confirm suitability and informs planting timing.
Spring Planting: The Early Bird Gets the Worm
For most areas, early spring is a fantastic time to plant a red maple. I aim for after the last expected frost but before the real summer heat kicks in. This gives the tree a good chunk of the growing season to establish itself before winter arrives. The soil is warming up, but the air is still cool, which is ideal for root development. It’s a good idea to check local extension office resources for specific frost dates in your area.
Fall Planting: A Close Second
Early fall is also a prime time for planting. I like to get my red maples in the ground at least six weeks before the first hard frost. This gives the roots enough time to grow before the ground freezes. The cooler fall temperatures are less stressful for the tree than summer heat, and the soil is still warm enough to encourage root growth. This timing allows the tree to settle in and prepare for the next growing season.
Avoiding Summer and Winter Planting
Planting in the middle of summer can be tough on a new tree. The intense heat and potential for drought put a lot of stress on young roots that haven’t established yet. Similarly, planting in winter, when the ground is frozen or about to freeze, is generally not recommended. It makes digging difficult and doesn’t allow any root growth to occur. I’ve found that sticking to spring or fall planting makes a big difference in how well the tree establishes.
Key Considerations for Timing:
- Frost Dates: Always know your average last spring frost and first fall frost dates.
- Soil Temperature: Aim for soil that is warming in spring or still holding some warmth in fall.
- Water Availability: Ensure you can provide consistent watering, especially during dry spells, which are more common in summer.
The goal is to plant when the tree can focus its energy on root growth without the added stress of extreme temperatures or frozen ground. This proactive approach sets the stage for a healthy, long-lived tree.
Choosing the right time based on your specific climate and frost dates is a simple step that pays off significantly in the long run for your red maple’s health. You can find a wide variety of red maples suited for different zones at Nature Hills Nursery.
Preparing the Planting Site
Before I even think about digging, I need to get the spot for my new red maple tree just right. It’s not just about sticking it in the ground and hoping for the best; there are a few things to consider to give it the best start.
Sunlight Needs
Most red maples, like the October Glory variety I’m looking at, really love a good dose of sunshine. I’m aiming for a spot that gets at least six hours of direct sunlight every day. While some maples can handle a bit of shade, full sun is usually the ticket for healthy growth and those vibrant fall colors.
Soil and Drainage
These trees aren’t too picky, but they do have preferences. I’ve learned they do best in soil that’s deep, rich, and, most importantly, drains well. Soggy roots are a big no-no for maples. I’ll be checking the soil in my chosen area to make sure water doesn’t just sit there after a good rain. If it seems a bit heavy, I might need to amend it with some compost to improve drainage and add some nutrients.
Space Requirements
This is a big one, and I’ve made this mistake before with other trees. Red maples can get pretty large, both in height and spread. I need to think about its mature size. A good rule of thumb I’ve heard is to take the tree’s mature width, divide it by two, and that’s roughly how far away it should be from things like sidewalks, driveways, or even my house’s foundation. For my October Glory, which can spread up to 35 feet, I’m looking at planting it at least 17-18 feet away from any structures. It’s better to give it plenty of room now than to deal with root problems later. I’m also keeping in mind that the root system can spread quite wide, so I need to make sure there’s ample space both above and below ground. It’s important to find a tree that fits your growing zone and your available space.
Giving your tree enough room to grow, both above and below the ground, is key to its long-term health and stability. It prevents future conflicts with structures and ensures the root system can develop properly without being cramped.
Digging the Right Hole

When I’m getting ready to plant a new tree, one of the first things I focus on is digging the right hole. It sounds simple, but getting this part wrong can set your tree back. For a red maple, I’ve learned that the hole needs to be just right – not too deep, not too shallow, and wide enough.
Hole Dimensions: Width vs. Depth
The hole should be about twice as wide as the tree’s root ball, but only as deep as the root ball itself. This is super important. If you dig the hole too deep, the tree can sink too low, which can cause problems with the roots. You want the top of the root ball, where the trunk starts to spread out (that’s called the root flare), to be level with or slightly above the surrounding soil. Making the hole wider gives the roots plenty of room to spread out into the new soil, which helps the tree establish itself much faster.
Preparing the Hole for Success
- Measure your root ball: Before you start digging, take a good look at the root ball of your red maple. Note its width and depth.
- Dig wide: Use your shovel to dig a circular hole that’s roughly two times the width of the root ball. This might seem like a lot of digging, but it helps the roots explore.
- Dig to the correct depth: Now, focus on the depth. You want the hole to be the same depth as the root ball. If the soil at the bottom of the hole is compacted, I like to loosen it up a bit. This gives the roots a better chance to grow downwards.
- Check the fit: Once the hole is dug, gently place the tree (still in its container or root ball) into the hole to make sure it sits at the right height. You can add or remove soil from the bottom as needed.
It’s easy to think that digging a deeper hole is always better, but with trees, that’s not the case. Planting too deep is a common mistake that can lead to root rot and other issues. Always aim to keep that root flare visible.
After digging, I usually give the hole a good watering. This helps settle the soil and shows me if the tree is sitting at the right level. It’s a small step, but it makes a big difference in getting your new red maple tree off to a healthy start.
Planting Technique
Alright, so you’ve got your spot picked out and the hole dug. Now comes the part where I get my hands dirty and put the tree in the ground. It’s not super complicated, but doing it right makes a big difference for the tree down the line.
First things first, I always give the roots a good look-over. If they’re tightly wound in the pot, I’ll gently loosen them up. Sometimes I’ll even make a few vertical cuts with a clean knife, just to encourage them to spread out into the new soil instead of just circling. The goal is to get those roots growing outwards, not just staying in a ball.
When I place the tree in the hole, I’m really careful about the depth. I try to match the depth it was in its nursery container. You can usually see a little soil line on the trunk. I want that line to be level with the surrounding ground after I backfill. Planting too deep is a common mistake, and it can lead to root rot, which is not what we want.
Checking the Depth
- Place the tree in the hole.
- Use a stick or shovel handle laid across the top of the hole to gauge the current soil line on the trunk.
- Adjust the soil level at the bottom of the hole or the root ball so the trunk’s soil line is even with the surrounding ground.
Backfilling the Hole
When I start filling the hole back in, I use the soil I originally dug out. I don’t usually add a bunch of amendments right into the backfill, unless the original soil was terrible. I just fill it in around the root ball, tamping it down gently as I go. This helps get rid of any big air pockets that could dry out the roots. I’m not stomping on it, just firming it up a bit.
I always fill the hole about halfway, water it well to settle the soil, and then finish filling and tamp it again. This seems to help everything settle in nicely.
Once it’s all backfilled and firmed up, I give it another good watering. This helps settle the soil even more and makes sure the roots have good contact with the soil. It’s like giving it a nice drink after all that work. I’ll also make sure the soil is level around the base, not creating a little bowl that will hold too much water, but also not leaving a hump that sheds water away. It’s a bit of an art getting that final grade just right.
Watering & Mulching After Planting
After getting your new red maple settled into its spot, the next big thing is making sure it gets the right amount of water and protection. This helps it get established and grow strong.
Watering Your New Red Maple
For the first year or two, I like to water my red maples pretty deeply, maybe once or twice a week. The goal is to keep the soil consistently moist, but not soggy. You know, like a wrung-out sponge. A good way to check is the finger test: stick your finger a couple of inches into the soil. If it feels dry, it’s time to water. If it’s still damp, hold off and check again tomorrow. This consistent moisture is key for new root development. During really hot spells, especially if you planted in summer, you might need to water even more often, maybe even twice a day if it’s super hot.
Applying Mulch
Once the watering is sorted, I move on to mulching. I spread a layer of about 3 to 4 inches of organic mulch, like wood chips or shredded bark, around the base of the tree. It’s important to keep the mulch a few inches away from the trunk itself to prevent rot and discourage pests. Mulch does a few great things: it helps the soil hold onto moisture, keeps the soil temperature more even (so it doesn’t get too hot or too cold), and as it breaks down, it adds nutrients back into the soil. It’s like a cozy blanket for the roots. I always make sure to check out mulching supplies if I need to restock.
Winter Protection
As winter approaches, I make sure to give the tree a good, deep watering before the ground freezes. This helps protect the roots from drying out over the cold months. For younger trees, I might also wrap the trunk with tree wrap or burlap to protect it from sunscald and frost cracks. I’ll take that off in the early spring.
Ongoing Watering Needs
Even after the first couple of years, it’s a good idea to keep an eye on your red maple, especially during dry spells. Established trees are more drought-tolerant, but they still appreciate a good soaking every few weeks when things get really dry. Watering in the fall before winter really sets in is also a good practice to help the tree survive the dormancy period.
Growth Expectations
When I first got my Red Maple, I was really curious about how fast it would actually grow. You see all these pictures of mature trees, but getting there is the real question, right?
Generally, a Red Maple is considered a moderate grower. I’ve found that in its younger years, it can add about 1 to 2 feet in height annually. Of course, this can change based on how well I care for it, the soil conditions, and the climate I’m in. It’s not like a Silver Maple, which is known for being super fast, but it’s definitely not a slouch either.
Here’s a general idea of what I’ve observed and read:
- Year 1-3: Expect slower growth as the tree focuses on establishing a strong root system. It might only gain a foot or so each year.
- Year 4-10: This is often the prime growth period. I’m hoping to see it put on 1.5 to 2 feet annually during these years.
- Year 10+: Growth will likely start to slow down a bit as the tree matures, but it will continue to fill out and get stronger.
It’s important to remember that these are just estimates. Things like consistent watering, proper feeding, and avoiding stress from extreme weather or pests can really make a difference in how quickly my tree reaches its full potential. I’m aiming for that sweet spot where it’s growing well but not so fast that it becomes unmanageable.
The key is to provide the right conditions from the start. Good soil, adequate water, and the right amount of sun will really help my Red Maple thrive and reach its mature size without issues. It’s all about setting it up for success early on.
I’m really looking forward to seeing it grow over the next few years. It’s exciting to think about how much it will change and how much shade it will eventually provide. For more on planting, I found some helpful tips on planting a Red Maple.
Ongoing Care
Now that your red maple is planted, keeping it healthy involves a few regular tasks. I’ve found that consistent care makes a big difference in how well the tree establishes and grows over the years.
Fertilization Schedule
Feeding your red maple is important, especially in its early years. I like to use a slow-release fertilizer in the early spring, right as the tree is waking up from dormancy. This gives it a good start for the growing season. Another feeding in late fall, after the leaves have dropped but before the ground freezes, helps the tree store up energy for the winter. If my soil tends to be a bit alkaline, I’ll opt for a fertilizer formulated for acidic soil to keep things just right for the red maple.
Pruning Practices
Pruning isn’t always necessary, but when I do it, I aim for the dormant season, usually late winter or early spring, before new leaves appear. This is the best time to remove any branches that are dead, damaged, or crossing each other. It also helps improve air circulation and light within the canopy, which is good for the tree’s overall health. I try not to over-prune, though, as that can stress the tree. Making clean cuts right at the branch collar is key for proper healing.
Pest and Disease Monitoring
Keeping an eye out for common issues is also part of the routine. I check the leaves and branches periodically for signs of trouble like aphids or scale insects. If I spot any, I might try a natural approach first, like insecticidal soap or neem oil. For fungal problems, like anthracnose, a fungicide applied in early spring before new growth emerges can help prevent issues. Good watering and making sure the soil drains well are also big helps in keeping the tree strong and less susceptible to problems. If I notice any branches that look diseased, I remove them right away to stop anything from spreading. It’s also a good idea to keep the tree away from areas with high salt content, like roadsides in winter, as maples aren’t big fans of salt.
Regular attention to these care aspects helps your red maple thrive, making it a beautiful addition to your landscape for a long time. It’s really about being observant and proactive with its needs.
Avoiding Common Issues
Staking Your Red Maple
When I first planted my red maple, I was worried about it standing up straight, especially with the wind we get. A stake can help a young tree get established. You’ll want to use a kit that has everything you need. Just make sure the ties aren’t too tight, as that can hurt the tree. I check mine every few weeks to make sure it’s not rubbing or constricting the trunk. The goal is to provide support, not to immobilize the tree.
Protecting Against Pests and Diseases
Keeping your red maple healthy means watching out for common issues. Aphids and scale insects can be a nuisance, and sometimes fungal problems pop up. I’ve found that keeping the tree well-watered and in good soil is the first line of defense. If I see pests, I often try a horticultural oil or neem oil first. For fungal issues, a preventative spray in early spring, right when the new leaves are coming out, can make a big difference. It’s all about being proactive.
Location, Location, Location
Thinking about where you put your tree is a big deal. Red maples can get pretty large, and their roots can spread out. I learned that you should plant them away from sidewalks, driveways, and even underground pipes. A good rule of thumb I read was to take the tree’s mature width, divide it by two, and that’s roughly how far away from structures it should go. This avoids future headaches with roots cracking pavement or messing with foundations. It also means giving the tree enough room to spread its branches without crowding other plants or buildings. It’s a bit of a puzzle, but worth it for a healthy tree.
Long-Term Planning
Beyond the initial planting, I think about the tree’s future. Pruning is important, but I try to do it only when needed, usually in late winter or early spring, before the sap really starts running. I focus on removing any dead or crossing branches to keep the canopy open for good air and light. It’s also important to remember that maples don’t do well with a lot of salt, so keeping them away from roads treated with salt in winter is a good idea. Thinking ahead about how the tree will grow and what it will need in five, ten, or even twenty years helps me make better choices now. It’s like planning for a long-term relationship with your tree.
When thinking about your trees, it’s smart to plan. This means considering where they are planted and how they will grow over time. Proper staking when trees are young can help them grow strong. Thinking about the long term helps avoid problems later on. Want to learn more about keeping your trees healthy? Visit our website for expert tips and services!
Frequently Asked Questions
When is the best time to plant a Red Maple tree?
I usually plant my Red Maple trees in early spring or fall. These times have milder weather, which helps the roots get settled before the hot or cold seasons arrive. If I must plant outside these times, I make sure to avoid extreme heat or freezing temperatures to keep the tree from getting too stressed.
Are early spring and early fall truly the best seasons for planting?
Yes, spring and fall are generally the best times. Spring planting lets the roots establish before summer heat, and fall planting allows roots to grow in cooler soil before winter. I find these seasons give the tree the best chance to thrive with less shock.
Why should I avoid planting a Red Maple in the middle of summer or winter?
Planting in the middle of summer can be tough on a young tree because of the heat and potential lack of rain, which can really stress its roots. Winter planting is also tricky because the ground might be frozen, making it hard for roots to grow, and the cold can damage new growth. I try to avoid these extremes.
How do my local climate and frost dates affect when I should plant?
I always check my local climate and frost dates. Knowing when the last frost is expected in spring and when the first frost arrives in fall helps me pick the safest planting window for my area. This is super important for making sure the tree gets a good start.
What kind of location and soil conditions does a Red Maple need?
I make sure the spot gets full sun to part shade, meaning at least 4 to 6 hours of sunlight each day. The soil should drain well, and I prefer it to be a bit acidic. I also give the tree plenty of room to grow, thinking about how big it will be when it’s fully grown, both in height and width.
How big should I make the hole when planting?
I dig the hole about twice as wide as the tree’s root ball, but only as deep as the root ball itself. This wide base helps the roots spread out easily. It’s important not to dig too deep, as planting too low can cause problems.
What’s the right way to put the tree in the ground and fill the hole?
When I place the tree in the hole, I make sure the top of the root ball, where the trunk starts to spread out (called the root flare), is level with or slightly above the surrounding soil. Then, I fill the hole with the soil I removed, gently patting it down to get rid of air pockets, and water it well.
What should I do right after planting the tree?
After planting, I water the tree deeply to help the soil settle around the roots. I also add a layer of mulch, like wood chips or bark, around the base. This helps keep the soil moist and protects the roots, but I always keep the mulch a few inches away from the trunk to stop rot.
Request a Quote
Our Services